
Making a Pottery Lamp: What to Plan Before You Start
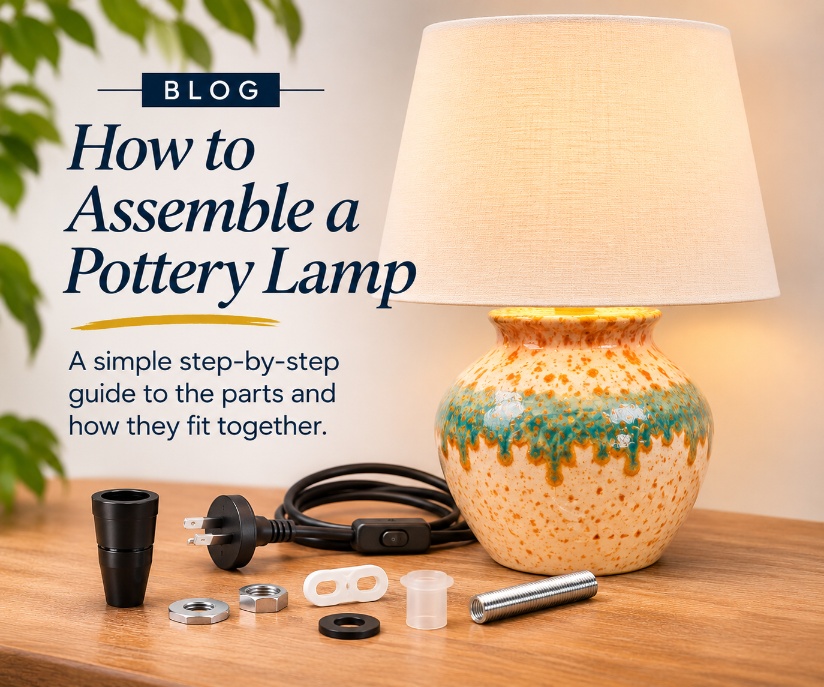
Handmade pottery lamps are a beautiful way to bring your own creativity into a lighting design. Whether you’re making a sculptural table lamp, a simple ceramic base or something full of texture and character, a little planning at the pottery stage can make all the difference.
If you’re creating a piece specifically to become a lamp, it’s worth thinking about the lighting components before you start shaping the clay. Planning ahead can help you avoid tricky adjustments once your piece has been fired and finished.
Start with the lamp in mind
Before you begin, think about how your finished pottery will work as a lamp.
Consider the overall height and shape, where the shade will sit, and whether the base will be stable enough to support it. A wider, heavier base can help provide stability, while a tall or narrow design may need extra thought.
It can also help to have an idea of the shade you’d like to use. The proportions of the pottery and shade work together to create the look of the finished lamp.

Plan the opening for your lampholder
If you’re making pottery with the intention of turning it into a lamp, you’ll need to allow for a 10mm hole in the top of your piece.
The 10mm threaded rod passes through this opening. The lampholder is fitted to the threaded rod on the outside of the pottery, while a washer and nut are fitted underneath to secure the rod in place.
It’s important to plan this opening while you’re making your piece. Once the pottery has been fired, creating or enlarging a hole can be difficult and may risk damaging your finished work.
The basic fitting arrangement:
- Make a 10mm opening in the pottery where you want the threaded rod to pass through.
- Pass the threaded rod through the opening.
- Fit the lampholder to the threaded rod on the outside of the pottery, along with washers.
- Fit a washer and nut underneath the pottery to secure the rod.
Check that the opening and fixing arrangement suit the components you intend to use before making your pottery.
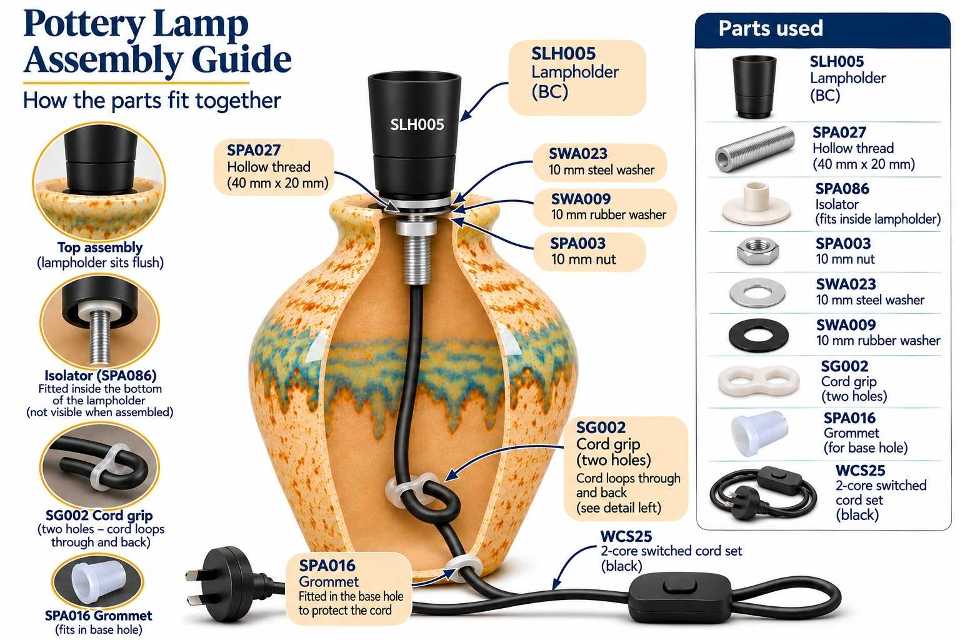

SPA027 10 mm Threaded Rod Length - 40 mm Length

SPA003 10mm Nut Thick STEEL

SWA019 Rubber Washer 10mm


SWA023 Zinc Washer 10mm

SLH005 BC Black 10mm
Choosing a lampholder
For a pottery lamp, we recommend an unswitched lampholder. You can use a switched cord set to turn the lamp on and off, rather than having to apply pressure to the top of your pottery each time.
This can be a good option for handmade ceramic bases, helping avoid unnecessary pressure on the finished piece.
The two common options are a BC (Bayonet Cap) or ES (Edison Screw) lampholder. The type you choose will affect which lampshade fitting you can use.
SLH005 BC Black 10mm
BC Black B22 10mm plastic Lamp-holder

SLH021 E27 Black 1/2 Thread
E27 Half-Threaded ES Bakelite lamp-holder + skirt ring
If you’re using a vintage lampshade, it will often have a BC fitting 29mm. Fabric shades with a 40mm fitting can also be used with a BC lampholder by adding a shade reducer SWA008. An E27 lampholder requires a shade with a Euro 40mm fitting. Check out our blog of fabric shade fittings for more detail
Allow for the cord
A ready-wired cord set can make creating your pottery lamp easier. These come with a plug and switch already fitted, so you don’t need to wire them yourself.
You can explore our full range of cord sets to find an option for your lamp.
When planning your pottery, think about how the cord will exit through the base. Allow enough room for the cord to pass through neatly, and make sure the finished lamp can sit securely.
Two small components are important here:
- Cord grip: Helps prevent the cord from being pulled out if it gets yanked.
- Grommet: Protects the cord where it passes through the pottery, helping prevent the edge of the opening from damaging the wiring.
Plan for these components while you’re making your piece, so the cord exit is suitable once the pottery has been fired.


SG002 Plastic Cord Grip 2 Hole

SPA106 Grommet Large Plastic CLEAR
Make sure the base sits securely
Your pottery lamp needs to sit firmly on the surface it’s being used on.
Once your pottery is finished, adhesive felt can be added to the underside to help protect furniture from scratches and give the lamp a softer finish.
Bring your pottery lamp to life
With a little planning before you start, you can create a pottery piece that’s ready to become a beautiful, functional lamp.
Electrical safety: Have the wiring completed by a suitably qualified person to ensure your finished lamp is safe to use.
Bring your pottery lamp to lifeWith a little planning before you start, you can create a pottery piece that’s ready to become a beautiful, functional lamp.
Electrical safety: Have the wiring completed by a suitably qualified person to ensure your finished lamp is safe to use.
Posted: Sunday 1 November 2026